User Console
The |User Console| displays
information about your OA Mobile account, including the number of
licensed users, active users, active sessions, and verified email
addresses. To access the
|User Console|, follow the
directions below.
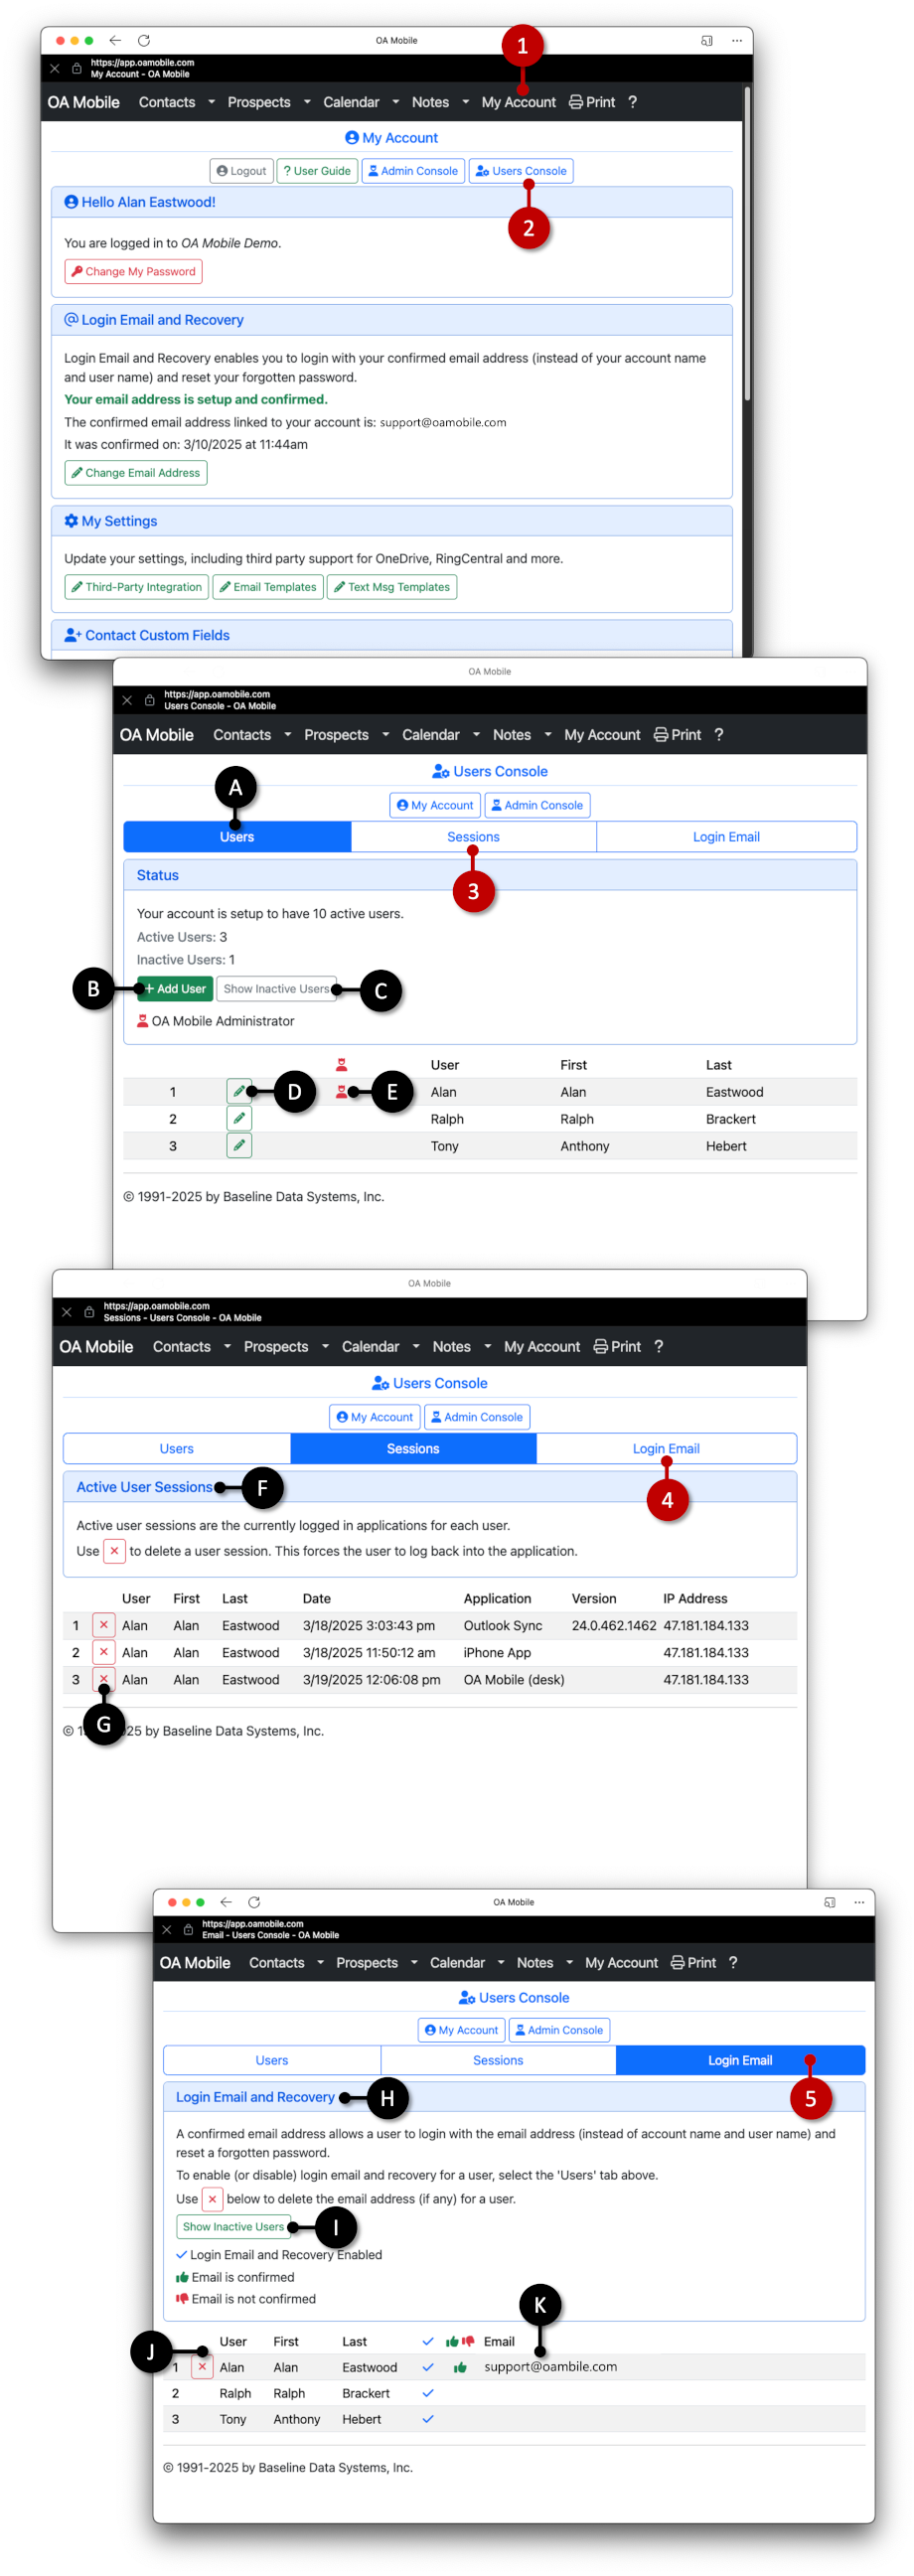
- From the |Navigation Bar|, select |My Account|.
- In the |My Account| section, select |User Console|.
- Select the |Users| tab to add, edit, activate, or deactivate users.
- Select the |Sessions| tab to view and terminate active user sessions.
- Select the |Email| tab to view and manage verified email addresses used for login recovery and email-based login.

- A: The |Users| section allows you to add users, view inactive users, edit user details, and identify account administrators.
- B: Select this button to add a new user to your account.
- C: Use this toggle to switch between active and inactive users.
- D: Select this button to edit a user, including changing the user's name, activating or deactivating the account, or assigning administrator privileges.
- E: Indicates that the user has administrator privileges.
- F: The |Sessions| tab displays active user sessions, including the login date, application, and IP address.
- G: Select this button to terminate an active user session immediately.
- H: The |Email| tab displays users with confirmed and unconfirmed email addresses. A confirmed email address enables login recovery and allows the user to sign in using an email address.
- I: Use this button to activate or deactivate a user's confirmed email address for login recovery and email-based login.
- J: Select this button to remove a user's confirmed email address.
- K: Displays the user's confirmed email address.
The |User Console| displays
information about your OA Mobile account, including the number of
licensed users, active users, active sessions, and verified email
addresses. To access the
|User Console|, follow the
directions below.
- From the |Navigation Bar|, select |My Account|.
- In the |My Account| section, select |User Console|.
- Select the |Users| tab to add, edit, activate, or deactivate users.
- Select the |Sessions| tab to view and terminate active user sessions.
- Select the |Email| tab to view and manage verified email addresses used for login recovery and email-based login.
- A: The |Users| section allows you to add users, view inactive users, edit user details, and identify account administrators.
- B: Select this button to add a new user to your account.
- C: Use this toggle to switch between active and inactive users.
- D: Select this button to edit a user, including changing the user's name, activating or deactivating the account, or assigning administrator privileges.
- E: Indicates that the user has administrator privileges.
- F: The |Sessions| tab displays active user sessions, including the login date, application, and IP address.
- G: Select this button to terminate an active user session immediately.
- H: The |Email| tab displays users with confirmed and unconfirmed email addresses. A confirmed email address enables login recovery and allows the user to sign in using an email address.
- I: Use this button to activate or deactivate a user's confirmed email address for login recovery and email-based login.
- J: Select this button to remove a user's confirmed email address.
- K: Displays the user's confirmed email address.
© 1991-2026 - Baseline Data Systems, Inc.